A wood lathe is a type of a lathe that us woodworkers use explicitly for woodworking projects. The machine rotates a piece of wood about a horizontal axis while pressed on a handheld cutting tool. In this step by step guide I will explain how to use a lathe.
A wood lathe can be viewed as the heart of many woodworking projects starts with using a lathe. Whether you want to perform turning, drilling, face deformation or knurling, a wood lathe is very handy. Below is a description of all the aspects that will help you know how to use a wood lathe.
Wood lathe sizes
The size you require is determined by the type of woodwork projects you are going to use it for. There are two standard sizes:
- Benchtop or small-sized wood lathe: This size is ideal if your woodwork projects revolve around small items such as small wooden bowls, bottle stoppers and wooden toys. This is the preferred wood lathe type among woodwork beginners. However, these lathes are also used by experienced woodworkers as they provide a detailed touch on the work the wood lathe is used for.
- Industrial sized or Large-sized wood lathe: For larger projects such as making furniture or turning larger wooden bowls, a larger wood lathe version is the best. Large wood lathes are also used to make handrail styles and spindles used in furniture. A large lathe means that its motor is too big, indicating that you are going to spend more to acquire it.
Components of a wood lathe
Motor
Located either inside or beneath the headstock, a motor produces the force that rotates your wood. If the motor is faulty, you cannot use your wood lathe for your projects. All the power that a wood lathe is supplied with goes to the motor.
Lathe bed
The flat surface between the tailstock and the headstock is the lathe bed. Lathe beds in most wood lathes are in the form of rails. This is the working surface that also provides a platform to adjust the position of the tool rest that it holds.
Tool rest
A tool rest is a raised surface on the lathe bed that is used to hold the lathe tools you are using for your project. Many wood lathes have an adjustable tool rest. The use of this feature depends on the type of woodworking project and the position required for that type of wood. The tool rest ensures safety and convenience when using a wood lathe.
Headstock
The headstock is the part of the wood lathe that holds most of the features needed for your project. This component houses the motor, the belt and the pulleys systems. A spindle protrudes on the inner end of the headstock.
Tailstock
On the opposite side of the headstock is a tailstock similar in shape as the headstock but only holding the spindle and the live cup center. Use the tailstock for securing the wood stock on the wood lathe. This rotating pin should, therefore, offer maximum versatility by locking securely in any position along the lathe bed.
Base
A solid horizontal bed made of iron is used as the base for the machine. The base ensures that only the motor and the spindle are turning and not the entire machine when the motor is powered ON. A lathe base should be heavy enough to support the machine firmly as any vibration of the machine can make the rotating wood difficult and unsafe to handle.
Power and Speed Control
With the speed control component you can alter the speed of the motor, the headstock spindle and the wood you are working on. The power control has a red button that you press to start or stop the rotation. The two functions are located in the same component in many wood lathes.
Emergency stop
If your main power switch is not working, this is the button to use to stop the rotation instantly. You should refrain from using the emergency stop more than once after the power switch button fails as the inertia force created can cause harm to the user or the wood you are working on.
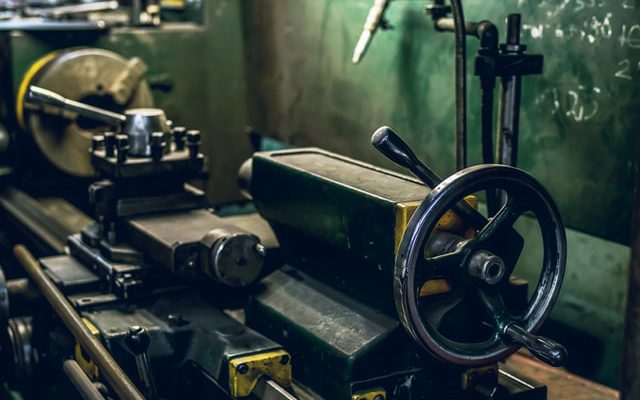
Hand wheels
These are circular metallic components found on both ends of the wood lathe. The wheels can be used to adjust the position of the tailstock or the headstock, altering the bed length.
Common terms used in wood lathes
RPM (Revolutions per minute)
This is a measure of the speed that the machine rotates the piece of wood. High RPM speeds up the task you are performing on a wood lathe and also ensure a fine and smooth finish.
Horsepower
This is the amount of power or torque a lathe motor can develop when rotating. The price of the wood lathe increases with increasing horsepower. A lathe with high horsepower, however, can handle more massive wood than a lathe with low horsepower.
Bed length
This is the distance between the spindle centers. The measurement is an indication of the wood stock length that can be turned by the wood lathe.
Composition
This is the solid working platform that can be offered by the machinery. The composition is expressed as the weight of the wood material it can hold.
Swing
This is the maximum diameter of the wood that will swing over the lathe bed and the length between the lathe centers.
Wood lathe tools
Before you get to the actual woodworking project with a wood lathe, you must first understand the other tools you will use for your projects. The standard tools needed to complement the lathe are:
Gouges
Whether you are turning a bowl, making a spindle or a wooden bottle stopper, you have to use gouges for the initial shaping. There two main types of gouges; the roughing and the detail gouges. The roughing gouges are used to clear most of the material, especially if your project involves deep cuts into the wood. Detail gouges are used to make finer and smoother cuts on wood. These gouges come in different sizes, designs and shapes. To make your bulk material clearing work easier, it is recommended to use the large sweptback gouges with longer handles.
Parting tools
These are woodturning tools used to separate a finished turning from the rest of the wood stock. Many parting tools are v-shaped with thin tips. Parting tools can also be used to cut square-shaped grooves on woodwork pieces, such as the spindles.
Scrapers
When working with flat or cylindrical wood pieces, scrapers come in handy to help remove a lighter material on wood. Dull scrapers are recommended to help make sure that you are not making deep dents on wood while you wanted to remove just a scrap.
Chisels
The versatility of chisels make them available in almost every woodworker tool kit. Chisels are used for most of the work done on the lathe as they come in tons of shapes and sizes. The choice of a chisel depends on the shape of the cuts you want to make on your wood stock. These are one of the tools that require frequent sharpening to ensure they make perfect cuts.
How to use a wood lathe
Before you start to use a wood lathe, you have first to set it up to make sure that it performs the required task efficiently. The tuning up processes includes:
Setting a stable power source near the machine
Almost all wood lathes are electric-powered and hence need a steady source of electricity to be near them. Make use of an extension if you are not near a socket, but make sure that it provides the required voltage as specified by the machine manual. It is advisable to have a power backup in case the source you are using has an outage.
Gathering and organizing all the tools you will require for the work. This should be done to minimize interruptions when you switch the lathe machine ON.
Greasing
If friction force is developed in the moving parts of the wood lathe, the force that comes from the motor is not fully utilized to turn the wood. This hence makes your machine energy inefficient. Before you start any work on the wood lathe, you must first apply a lubricant on the joint of the moving parts.
With all this information, I think it is time to get your hands on the wood lathe to turn and shape that piece of wood.
Mount the Woodstock
For end to end turning:
With the lathe tools already placed on your tool rest, attach one end of your wood stock to the tailstock. Witht the handwheel you can tighten the tailstock spindle. Keep going until the other end is pushed and tightened into the spur center of the headstock. Make sure that all the other clamps on the wood lathe are fastened to the wood stock to prevent the wood from flying off when you start the machine.
For headstock turning:
This type of turning connects one edge of the wood stock to the wood lathe while leaving the other to be worked on. Connect one edge to the spur center and fasten it with the hand crank. This type of turning is common in making smaller equipment and in bowl turning.
Position your tool rest
The tool rest should be situated in a position that is in reach of the wood lathe user. The tool rest should, however, not come into contact with the wood being rotated. A parallel position of the tool rest to the lathe bed is recommended for better handling.
Turn the wood lathe ON
Connect the wood lathe to a source of power and power it up using the power control. You should ensure that your energy is steady for a consistent rotation without interruptions. Use this step to set the wood lathe speed. Consider starting your project with a lower speed.
Remove the bark of the wood stock
If you are working with raw wood pieces, you should first remove the bark unless you want to leave it on for post turning finishing. A screw is the best tool to use for bark scraping as using a roughing gouge can fly these small chunks to you and potentially cause injury.
Make rough cuts and start shaping on your wood stock
Use the roughing gouge to remove the bulk material on your wood. Also, make use of the larger chisels to develop a basic shape on your wood stock. Always hold these tools with a firm grip as the rotating force of the wood creates an inertia force that you need to overcome. Be patient when shaping wood by making several lighter cuts until you achieve the required shape.
Change the tools and reposition the tool rest
When the basic shape is formed, use smaller and lighter tools such as the detail gouge or the parting tools to make the delicate and finer cuts on your wood stock. If you are cutting your wood from the end, you should move the tool rest closer to the headstock.
Apply more body pressure for deeper cuts on your wood. Increase the RPM through the speed control and tune up the wood stock until you get the required design and shape. After you have finished your profect, turn OFF the instrument and remove your wood stock from the spur center for finishing processes.
Tips on using a wood lathe
Proper lighting
Natural lighting is not enough when using a wood lathe. You need to see clearly the finer details of the wood stock you are turning. Invest in a portable lamp or use a fixed electric lamp in the room where you use your wood lathe.
Start with the basics
If you are a beginner, it is advisable to start with the basic woodturning projects such as making wooden bottle stoppers. Once you build your confidence in using the machine, you can proceed to more advanced and intricate projects such as making wood furniture spindles.
Pre-cut the stock before mounting
If you want to minimize the time and energy you spend on it, you must cut the wood before connecting it to the machine. A pre-cut could be either longitudinal or transversal. You should mainly do this when you are using hardwood that is harder to cut when turning.
Keep your manual near your working table
Although many wood lathes have the same working principle, some come with special instructions. Due to this reason, you should read your manual and understand all the special instructions, especially safety measures.
Conclusion
This is a must have machine if you want to do decorative wood projects. From as low as $300, you should find a good one that suits can assist in all your woodworking projects. The wood lathe can also be ideal for bowl turning.
The secret to successfully using the wood lathe is always having the correct tools by your side. If you acquire these items, follow the above guidelines and start your woodturning.
No Comments